Access a remote USB device over the network
A USB device plugged into a machine somewhere else — a flash drive, a license dongle, a hardware security key, a microcontroller programmer — can be attached to your computer over the network and show up as if it were in your own port. The kernel feature that does this is USB/IP; it speaks plain TCP on port 3240, so LRO carries it the same way it carries SSH or a web panel.
usbip userspace tools on both machines — this is outside LRO and cannot be faked. On Linux: install the tools (usbip / linux-tools) and load usbip-core + usbip-host on the remote machine, vhci-hcd on yours. On Windows, use usbipd-win for the exporting side. The LRO steps below are identical regardless; only the usbip commands are OS-specific.-
Export the USB device on the remote machine
On the machine the device is plugged into (the client), start the USB/IP daemon, find the device’s bus id, and bind it so it can be exported.
usbipdlistens on127.0.0.1:3240.$ sudo usbipd -D # start the USB/IP daemon (port 3240) $ usbip list -l # find the busid of your device $ sudo usbip bind -b 1-1.2 # export it (use your busid)Keep it bound to
127.0.0.1only — there is no need to expose 3240 to the network. LRO reaches it locally from the same machine. -
Add the USB/IP endpoint on the client agent
In the panel, Endpoints → Create endpoint. Pick the client agent (the machine with the device), name it e.g. Lab USB, and set target
127.0.0.1and port3240.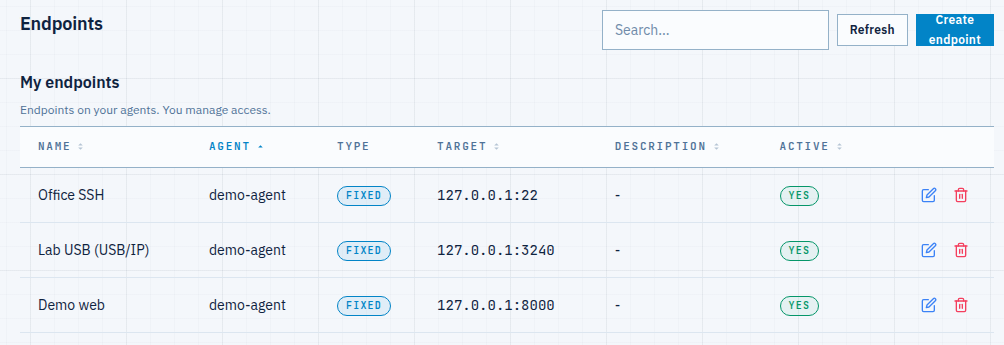
Fig 1. The USB/IP endpoint lives on the client agent — target 127.0.0.1:3240, the local usbipd. -
Open a tunnel from your machine
Tunnels → Add tunnel. Choose your computer as the support agent, pick the Lab USB endpoint, and set listen port
3240— matching the USB/IP default keeps the attach command simple. Create it; it goes Active in a moment.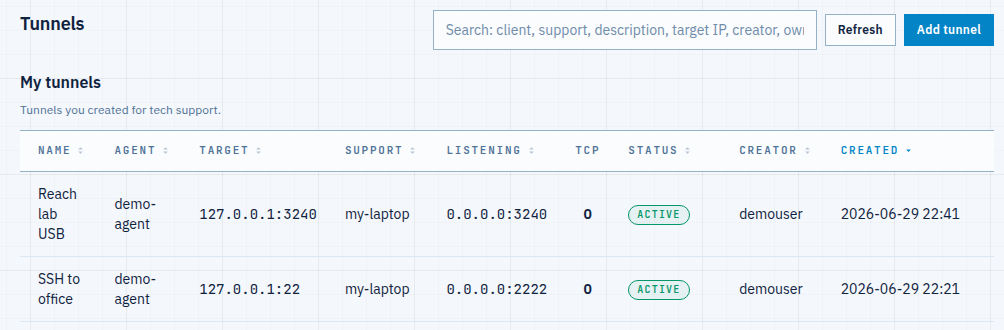
Fig 2. The active tunnel — your machine listens on 3240 and forwards to the remote 127.0.0.1:3240. -
Attach the device over the tunnel
On your computer (the support side), point
usbipat the local listen port. Because the tunnel listens on the USB/IP default 3240,-r 127.0.0.1is all you need. List the exported devices, then attach the one you want:$ sudo usbip list -r 127.0.0.1 # see what the remote exports, through the tunnel $ sudo usbip attach -r 127.0.0.1 -b 1-1.2 $ lsusb | grep SanDisk # the remote device now shows up locally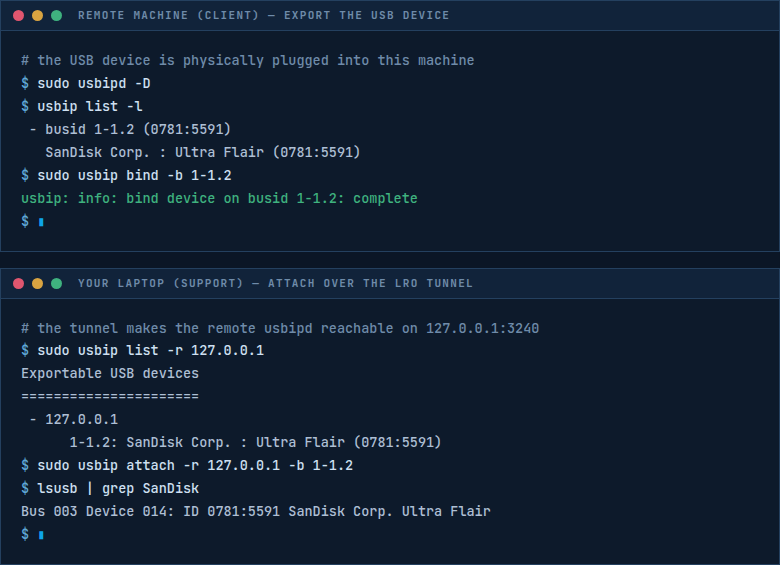
Fig 3. Export on the remote (top), attach over the tunnel on your machine (bottom) — the device appears in lsusbas if plugged in locally.The device is now a normal local USB device: mount the flash drive, read the dongle, flash the board. When you are done, detach it and the port frees up:
$ usbip port # list attached remote devices $ sudo usbip detach -p 00 # detach by port number
Notes
- Both sides behind NAT — no problem. Each agent dials out; USB/IP’s 3240 is never exposed to the internet, only to the local tunnel.
- Lock it down — set Allowed addresses (ACL) on the tunnel so only your machine can reach the listener. A USB device exported to the wrong person is a real device in their hands.
- Latency matters — USB/IP is sensitive to round-trip time. Flash drives, dongles and serial programmers work well; isochronous devices (webcams, audio) may not. Keep the tunnel encrypted for safety; the bottleneck is the link, not LRO.
- Windows exporting —
usbipd-winbinds and shares devices; the endpoint and tunnel steps in the panel are unchanged. - Any TCP service — USB/IP is just one protocol over the same tunnel. The mechanics are identical to reaching SSH behind NAT; only the port and client tool change.
Plug in a device anywhere — use it like it is on your desk.
Create an account →